
While smoking ribs is by far the best cooking method for making a rack of ribs as tasty as possible and giving it that juicy yet soft quality that just melts in the mouth, there are a few popular methods of how to actually smoke a rack of ribs with the 3-2-1 method being one of the most popular.

This method can instantly draw beginners in with just how easy it is to do, simply smoke the ribs for 3 hours unwrapped (meat side up), 2 hours liquid wrapped in foil (meat side down) and 1 final hour unwrapped (meat side up).
The issue is while this method is simple to do and is one of the fastest ways of cooking up some ribs, it more often than not can lead to the ribs becoming overcooked and dried out rather than retaining their flavor and delicious soft texture.
Too much time using this method just leads to dry ribs because of just how much time it has to spend in the foil.
Luckily there are a multitude of methods for smoking a rack of ribs that can take around the same amount of actual cooking time but still retaining the juicy flavors and keeping the meat tender and fresh for when you bite into it.
We have taken a closer look at some of the best ways you can smoke a rack of ribs that will give you much more accurate results every time you smoke them to ensure your ribs won’t fall apart as soon as they come out of the smoker.
What Is Wrong With The 3-2-1 Method?
There are two main issues with the 3-2-1 method that make it unreliable and quite outdated, for one is just how much time the meat has to spend under the foil during the cooking process, from 2-3 hours overall.
While this may not sound like very long, because it’s right in the middle of the process it’s enough to dry the meat out and prevent it from becoming as tender and tasteful as possible, instead resulting in a texture which just tastes overcooked.
Secondly, the process just takes far too long in general and makes the meat so tender that it falls completely off the bone or even worse, becomes so mushy it’s barely even on the bone at all to begin with.
Sometimes we can see a method aiming to give that ‘falling off the bone’ feature to the ribs, however the reality is this is far less enticing than it sounds, causing the meat to be far too soft to properly enjoy when eating.
Overcooking meat to this degree is a common mistake and one many of us make when we are first learning the ropes of using a smoker, however as you learn to adjust the temperature and become accustomed to the smoking times, you will find that you don’t have to settle for these unpleasantly dry ribs and can cook them to a point of actually staying on the bone but still being easy enough to tear off when biting into.
How Long Should It Normally Take To Smoke Ribs?
The 3-2-1 method guarantees that a rack of ribs will be done in 6 hours flat.
The reality is that this time can vary by quite a large degree depending on the type of ribs you are cooking and the overall size of them.
There are a few other factors that can also dictate how long a particular type of rack will take in the smoker, so to make this clearer here is on average how long it takes to smoke each type of rack.
Baby Back Ribs
Baby rack ribs are the most common form of ribs and this is not just for how accessible and easy they are to pick up.
A typical rack of baby rack ribs usually contains a bit less meat than other racks but to make up for it they contain up to 13 ribs.
Along with their chewy and delicious barbecue taste, baby rack ribs are also very easy to cook in the smoker, often taking 5 hours in total.
Three hours of this is simply just cooking the ribs at 225 degrees Fahrenheit and an extra two hours for cooking the meat foiled, leaving just enough time for the meat to be thoroughly heated but still remain on the bone.
Pork Ribs
A fuller rack of pork ribs with more meat on the bone and bigger in size will take a bit longer in the smoker, usually around 6 hours.
While this is essentially the same amount of time as with the 3-2-1 method, there is far less time for using foil to cover the meat so it will still come out nice and juicy on the bone.
Beef Short Ribs
Beef short ribs are another variant with a bit less meat on the bone that comes in decent portions.
How long it takes to smoke will actually depend on the temperature when it comes to short ribs as there is no definitive recommended heat which has been seen to cook them the best.
At a lower setting of 225 degrees it will usually take about 6 hours altogether, however if you choose to turn the heat a bit higher to around 275 degrees, they can take as little as 3 hours to fully cook.
Lamb Ribs
While lamb ribs are filled with a very unique and memorable flavor, they are actually quite small in actual size and portions with the meat being a bit more slim than usual.
Because of this, they are often smoked at a lower temperature around 225 degrees only for about 3-4 hours until they are well done.
Spare Ribs
Spare ribs, despite being known for how meaty they can be, are too best smoked on a lower temperature at around 225 degrees for only around five hours, however just always make sure to check the ribs periodically to ensure they don’t dry out after all that cooking.
Half Rack
Despite the name suggesting that they would be much smaller than a regular rack of ribs, a half rack still has about the same amount of meat on each bone and therefore will still take around the same amount of time to smoke at 5-6 hours on a medium temperature.
This is because just like the fuller racks, the collagen and connective tissue in the ribs requires enough time in the heater to break down to make sure the meat does not just end up too tough and chewy when it comes out of the smoker.
What Temperature Should You Cook Ribs At?
The 3-2-1 method maintains that for basically any kind of ribs, you should use a smoker heating setting of 225 degrees.
While this can work for some ribs, for others it will just simply cook them far too quickly or in some cases will not even be hot enough to cook the ribs as well as they need to.
In fact, 250 degrees is usually seen as the more optimal heating setting because it is right in the middle of being too mild for a rack and too hot, making it perfect for heating up the internal temperature of the ribs while still retaining essentially all of their flavor.
If you smoke at a bit of a lower temperature, usually below 225 and above 180 degrees, it can be much harder to actually monitor and keep track of your ribs and because they still need to remain in the smoker for a decent amount of time, it more often than not just leads to overcooked meat which can be flavorless or even too mushy.
If you do want to cook at a higher temperature past 250 degrees, maybe to speed up the cooking process a little bit, then this can be done though it should not be the go-to option for smoking ribs every time.
A higher temperature will not actually improve the texture of the meat and if anything, is more prone to overcooking the ribs and making them far too soft to where they fall apart before you even bite into them.
Preparation Tips For Smoking Ribs
Before you get stuck into smoking up your ribs, there’s a few key tips to keep in mind so you can make the process as easy as possible, but also ensure that the ribs come out nice and well cooked rather than being burnt or soft to the point where they lose all their flavor.
Type Of Ribs
There are a wide variety of rib variants you can choose from depending on how you want the meat to taste and how many people you are serving, whether it’s the smaller but more appetizing flavor of baby back ribs or a meatier option like full pork or lamb racks.
All types of ribs however come with the possibility of being damaged or a bit on the lighter side.
One thing to look out for is that the ribs have a good amount of fat marbling on the top rather than having large chunks of fat to give it its flavor.
It’s also important to look for an even thickness across each rib so you don’t end up with one or two which are much smaller and can get burnt easily.
Trim The Membrane
As a general rule of thumb and to make sure the meat is not too dry or tough when you have finished cooking it, it’s a good idea to trim off the silver membrane that runs down along the backside of the ribs.
The easiest way of doing this is to lay the ribs side up and from one end and near the corner, use a knife to gradually lift up the thin membrane from the bones.
Then, carefully use a paper towel to hold down the corner to finish peeling it off from the rest of the rack.
Choose Seasonings
Seasonings are part of what makes ribs so delicious by adding just that extra bit of personal flavor to compliment the barbecue.
Not only does this mean it’s a great idea to seek out and pick up any seasonings you think would satisfy your tastebuds the most, but it can also be a great idea to get some ingredients to help the seasoning stick.
Yellow mustard and olive oil are some of the best ingredients for this, simply coat the ribs from either side with both and it will create a surface that seasonings can stick to far easier.
Save The Sauces
Alongside the seasonings, sauces are also part of what makes ribs such a delightful treat, it’s hard to imagine having a well cooked rack of ribs with no barbecue sauces served alongside it.
However, while we are all passionate about spreading our favorite sauces over some ribs to make them even tastier, it can be much more worthwhile in the end to actually save the sauce for a little later down the line.
The best way to use most sauces is to add them onto the ribs not long before they finish cooking, around 30-40 minutes before pulling them off the smoker.
Mop the sauce on around this time to let the flavor really sink in and become absorbed within the meat.
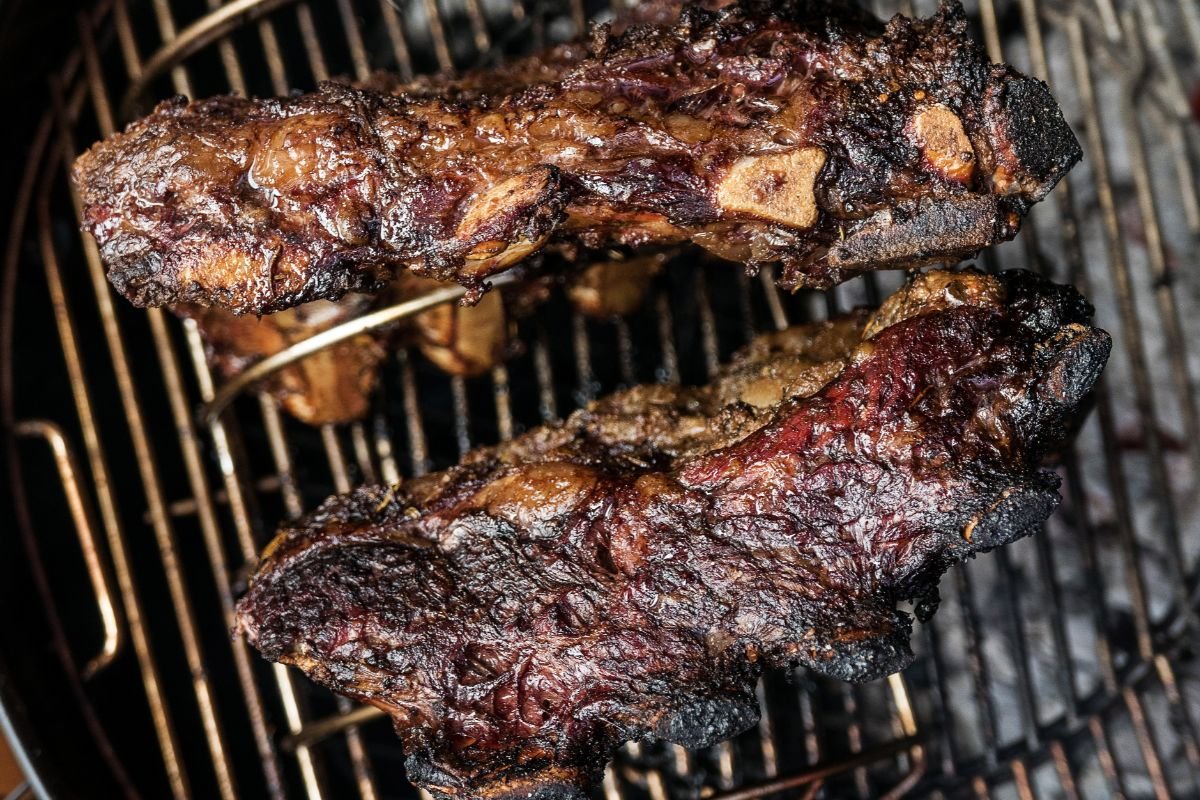
Maintain Fire
The fire itself is the most important compartment of the smoker, however keeping an eye on the heat level is crucial.
It’s very important to maintain a thin, blue smoke instead of a raging black smoke that can much easier overcook the meat and ruin its flavor.
Start slow as you’re building your fire and keep an eye on it just to make sure it’s not getting out of hand. It is far easier to stoke the fire more than to calm a raging fire.
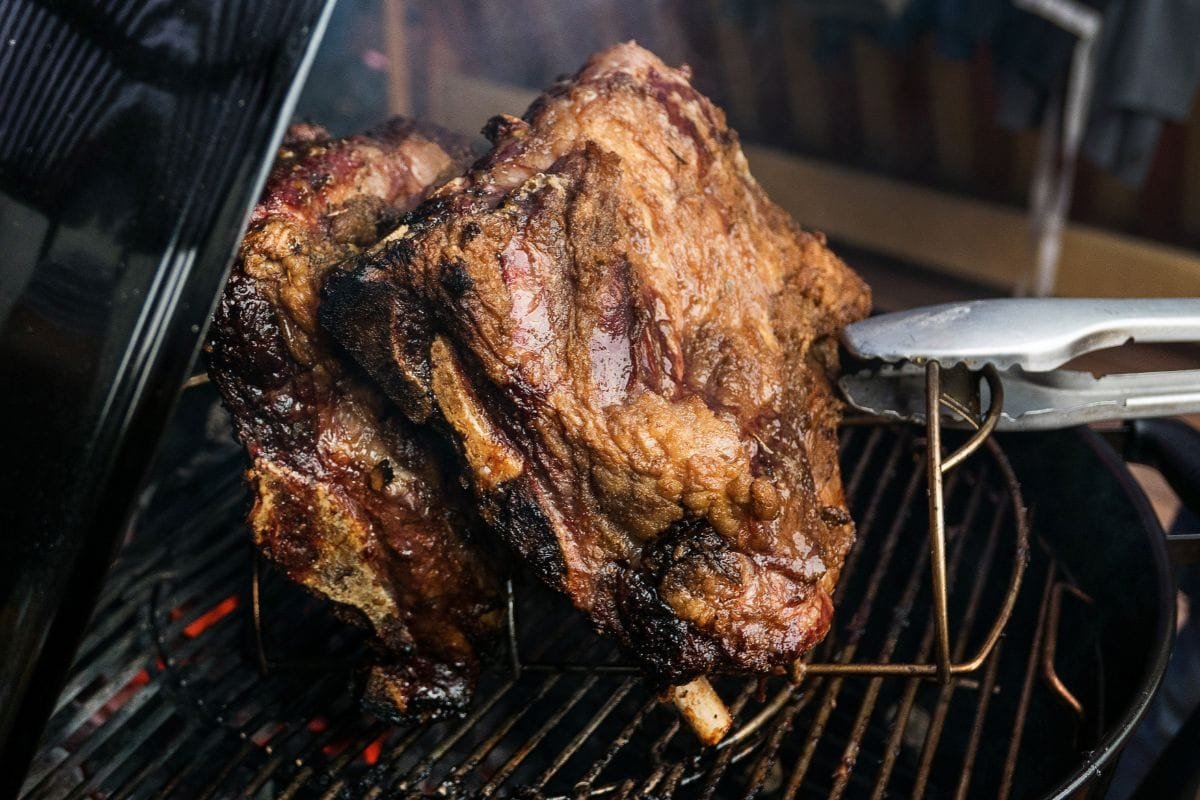
‘Fall Off The Bone’ Myth
It can be easy to think with ribs that ‘fall off the bone’ means that they are well cooked since this is a catchphrase thrown around a lot when it comes to cooking ribs.
In actuality, this isn’t exactly true and makes it seem far simpler than the ribs actually need to be.
Your goal in the end is to smoke the ribs until the meat slides off the bone with a slight amount of pressure so that you can easily chew it apart when it’s finished cooking.
If you find that the meat is literally falling off the bones when you pick it up with some tongs however, then this means it has been overcooked and can even lead to the meat being incredibly mushy and unpleasant to eat.
The 3-2-1 method can lead to this overcooked state quite easily, so it’s good to try out other smoking methods to get the ribs to a point where they are still juicy to bite into, but not soft to the point of breaking apart entirely.
Best Methods Of Smoking Ribs
The 3-2-1 method is certainly easy and still widely popular, however there are a plethora of other smoking methods that won’t only give you far more predictable and satisfying results with the ribs remaining tasteful and chewy when they come out of the smoker, but in some cases it can even take a much shorter time to cook for when you are in a hurry for preparation.
Here are some alternative smoking methods which work extremely well and are great options for cooking up some ribs to the point where they are juicy and sizzling hot with flavor.
The 3-1-1 Method
While this may sound very similar to the 3-2-1 method, it actually not only involves different steps but can result in an entirely different rack of finished ribs because of how much less foil it uses and how it only actually uses the foil very sparingly without entirely surrounding the meat for a continuous amount of time.
Step 1 – Choose Ribs
For the meatier variants of ribs, whether this be a full rack of pork, lamb, beef or even spare ribs, then this method will go through the same process and will take around the same amount of time.
The only major difference is baby back ribs which, because of their far smaller and thinner texture, usually have a much lower smoking time of only around 2 hours.
Step 2 – Apply Rub
First, you will want to prepare the ribs by applying your preferred rub to the rack, specifically both sides for around half an hour to an hour before cooking.
It is also heavily advised to ensure to use some salt in the rub in order to draw some of the moisture from the surface of the meat.
Step 3 – Set Up Smoker
Now once the ribs are nice and prepared, you will need to set up the smoker to the correct heating setting.
Heat up the smoker to 250 degrees and if you are planning to use wood chips as a way of generating the smoke, just make sure to soak them in some water for at least 30 minutes before proceeding to drain them.
Additionally, if you are using a smoker without a built-in water pan, then also make sure to place a small shallow pan of water into the cooking chamber before use.
Step 4 – Set Ribs On Smoker
When the smoker has stabilized at the correct temperature, it’s time to set down and arrange the ribs onto the smoker to begin cooking.
Set the ribs so that they are on the grate, bone side down.
Close the lid as soon as the ribs are placed, and proceed by leaving them to smoke for 3 hours.
Replenish the smoker with fuel and water every now and again just to keep the smoker going and working as it should.
Also while it is advised to open the lid just to quickly check on how the ribs are cooking and to ensure they are not getting too dried out, try not to do it too much or continuously in a short period as it can affect the smokers temperature stability.
Step 5 – Place Foil And Extra Flavors
After 3 hours of cooking in the smoker, quickly remove the ribs from the smoker.
Take extreme caution with this as they will be extremely hot by this point, and make sure to close the lid quickly so no heat is lost.
Now with each rack, place the meat side down on a piece of aluminum foil and wrap the foil completely around it so it surrounds the meat.
This is also where you can add any extra additions whether it be some herbal seasonings, or even pouring some apple cider or beer for more of a fruity and flavourful taste that can go perfectly with the barbecue flavored ribs.
Step 6 – Continue Smoking
Once the ribs are filled with your extra seasonings and surrounded with the foil, return back to the smoker and continue to cook for a final hour.
Step 7 – Remove And Test Ribs
Now, your ribs will be nicely cooked but not dried out to the point of being too soft or mushy to really enjoy.
Remove the ribs from the smoker with caution and carefully unravel the foil packaging.
It can be a great idea to actually test how well down the ribs have been cooked.
This can be easily done by inserting the point of a sharp knife or a toothpick into the meat between the bones which it should be able to penetrate fairly easily.
If the meat seems far too tough for the knife to slide into, then the ribs are probably undercooked and need to be cooked for at least 2 hours longer.
When you’re happy with the texture and appearance of the ribs, lift them up with some tongs and remove the foil.
While doing this, if the ribs are done to a good degree the meat on the bones should be crispy enough to still stick onto the bone but be much softer than when you first started cooking.
If you do pick up the ribs and the bones start to fall off incredibly easily, then the meat could be just slightly overcooked which can happen if you have the foil on for too long or leave the smoker on for longer than needed.
Step 8 – Cook For Final Hour
If you are happy with how the ribs are looking, it’s time to cook them for a final hour before they are ready to eat.
Recover the ribs with the foil and continue to cook for 1 hour.
Finally, remove the ribs and test them with a knife or toothpick again where the meat should be fairly easy to penetrate, but not completely collapsing off the bone.
If you find that the knife is finding it a bit harder to penetrate the ribs because they might be a little tougher, it can be worthwhile to just keep cooking them and testing their softness in 15 minute intervals until you like the feel of them.
While serving barbecue sauce with ribs is a must, you can also choose to apply the barbecue glazing for the last 30 minutes of smoking to really allow it to set into the meat and give it that succulent smokey flavor ribs are known for.
The 2-2-1 Method
This smoking method is similar to the previous 3-1-1 method, however because of how thin and small baby back ribs are, but still a very popular rib variant, they do require a slightly different method of smoking to give them the perfect texture where they can retain all their flavors.
Cooking baby back ribs with the 3-2-1 method, even if it is for an hour or two shorter, can easily lead to them getting tired out compared to other types of ribs not only because of their tiny stature, but also because of how much time the foil spends on them.
This method is therefore far more suited to cooking up baby rack ribs specifically so that they are just the right heating when cooked thoroughly.
Step 1 – Prepare Baby Back Ribs
Start by removing the membrane from the rib rack if you haven’t already and trim off any excess fat that you would rather not have attached while eating.
It can also be a good idea to just clean the ribs by quickly running them under some cold water and drying them off with some paper towels so that they are nice and fresh to be placed on the smoker.
Step 2 – Prepare Smoker
This cooking method uses a slightly lighter heat at 225 degrees, set this heat setting to the smoker and give it a few minutes to heat up accordingly.
Step 3 – Place Ribs On Smoker
A lot of people when preparing some baby back ribs will slather them very lightly with some yellow mustard to give them an even sweeter taste for when they are finished and because it helps any extra seasonings to adhere to the meat as they should.
Once the ribs are seasoned up as you would like them and coated with some mustard, place them bone side down on the smoker and close the lid.
Leave them in the smoker for 2 hours and once they nearly reach the end of this cooking stage, lay out some aluminum foil, or if the foil is on the slightly thinner side, make a double layer just to make sure it is thick enough to retain the ribs.
Step 4 – Remove Ribs And Place In Foil
Remove the ribs from the smoker very carefully and place them in the foil with the bone side facing down.
If you are a lover of sweet foods and want to add some tangy sweetness to your ribs, you can also choose to add just a couple teaspoons of sweet chili or honey to the foil before you place the ribs onto them.
Next, you will need to fold the foil around the ribs to the point where the ribs are tightly wrapped up so they can be placed back onto the smoker to cook for a bit longer.
Step 5 – Place Back Into Smoker With Foil

Now that the ribs are nicely tied up in foil, place them back on the smoker for 2 hours until they begin to slightly soften and tenderize.
Step 6 – Test Baby Back Ribs
At this point it can be very worthwhile just checking that the ribs are cooking as they should and are not leaning into becoming dried out and very unpleasant to finally eat.
To test for the ribs doneness, slide the point of a knife or a toothpick into the meat between the bones, this will judge whether you need to keep the foil on the meat for longer which is very important for baby rack ribs as they can become dried out very easily.
Step 7 – Continue Cooking The Ribs
If the toothpick or knife meets a lot of resistance in the meat to the point where it cannot easily slide through the meat, then this indicates that the meat needs to stay in the foil longer while if you can cut through the meat with ease, they no longer need the foil.
If your ribs are a bit tough and do require foil for a little longer, place them back on the smoker with foil for half an hour, and then remove the foil to let them cook without it for another hour.
If however the baby rack ribs have cooked thoroughly and you find the meat can be cut well but is not too weak and mushy, then place the ribs back in the smoker uncovered for one more hour.
For this last hour it can also be a good idea just to check on the cooking process as you go.
As soon as you find the ribs are tender enough for your liking, then you can remove them.
Sometimes this can make the last cooking stage far easier with it sometimes being as little as half an hour until the ribs are the perfect texture.
Step 8 – Remove Baby Rack Ribs And Serve
If the small meat on the ribs are succulent and fresh without dropping off the bone entirely, then the ribs will be well done and a delicious appetizer for you and your guests that can be smoked in little to no time.
Electric Smoker
Maybe you have an electric smoker, these products have been becoming more and more accessible in recent years and have begun skyrocketing in popularity.
This is for very good reason, while they can be on the slightly pricer side because of how modernized and state of the art electric smokers are, they have quite a few benefits including being incredibly easy to use for beginners, much cleaner with very little residue to clean up and more often than not having far more space than regular smokers.
Luckily, smoking ribs in an electric smoker is not only easy to do, but can produce some incredibly tasty ribs in next to no time.
Step 1 – Prepare And Rub Ribs
Start by removing the membrane or any excess fat surrounding the ribs that you would rather not have when eating the finished product.
It can also be a great idea to make your own rub to apply to the ribs to give them an even more flavourful taste.
Luckily you can make a rub with just these few ingredients:
- Half a cup of brown sugar
- 2 tbsp of granulated garlic
- 1 tbsp of kosher salt
- 1 tbsp of ground black pepper
- 1 tbsp of paprika
Mix these ingredients together well in a plastic bowl and make sure there are no visible clumps in the mixture as you go.
Place a lid over the bowl or container, and shake for a minute or two just to make the mixture nice and smooth.
Then, apply the rub to each side of the ribs so they are well coated.
Step 2 – Marinate Ribs Overnight
This step is a little different to the other ways of smoking ribs which rarely involve marinating, however for an electrical smoker it can be a good idea just to let the ribs absorb as much flavor as possible before they begin cooking.
This is because unlike regular charcoal smoking, electric smoking does not naturally infuse the meat with as much smoke which can make it harder to carry the flavors through, so preparing the flavors in advance can be a great way to mitigate this.
Put each cut of the ribs into a ziplock bag and leave them to sit and soak up the rub flavor overnight.
Step 3 – Heat Up Smoker
Heat the smoker up to 225 degrees, it should reach this setting at around 20-30 minutes.
Make sure to also prepare the smokers wood box and place a smoker water pan into the chamber to help it remain moisturized as it cooks.
Step 4 – Place Ribs On Electric Smoker
Once the smoker is heated up to the correct temperature, it’s time to start cooking the ribs.
With an electric smoker they usually come with multiple racks from top to bottom, giving you the choice over what heat level you would most like to use.
To make sure the ribs are getting the most optimal cooking temperature possible, it is advised to place the ribs on the middle rack.
Close the lid, and leave the ribs to cook and sizzle for 4-6 hours.
Step 5 – Occasionally Check On The Ribs
The beauty of electrical smokers is they are much less hands on, allowing you to simply lay the ribs in the machine and just allow it to cook as it goes.
Many electrical cookers actually have built in temperature monitors allowing them to adjust the heating settings according to how well the meat is cooking meaning in some cases, you may not even need to do anything at all.
It is always worth checking on the ribs however just to make sure they are not getting too burnt out or dried up.
It can be a good idea to check up on the ribs 2 hours into the cooking process.
Step 6 – Test Ribs
To test how well the ribs are cooking, using a meat probe or toothpick just try nudging the ribs to see how they are coming along.
If you find that the end of the probe can quite easily sink into the rib flesh but with there still being some toughness, this is a very good sign since early on the ribs will still be fairly tough.
If the meat has receded slightly on the bone, this is another good sign that the meat is cooking nice and thoroughly.
Step 7 – Add Foil (Optional)
If the ribs are coming along nicely, then you can shut the lid back up and let them continue cooking.
If by this 2 hour mark they are not tender however, then some foil can help retain the moisture and heat them up better.
Wrap the meat up in some tight aluminum foil with a dash of apple cider vinegar and water to help retain the ribs succulent flavor.
Place the ribs back into the smoker and check again in 90 minutes before checking again.
Step 8 – Add Sauce
After around 4-5 hours of cooking, check on the tenderness of the ribs.
If they look soft but still juicy, quickly brush the ribs down with some barbecue sauce to allow it to soak in while it finishes off.
Leave the ribs to cook for a final 30 minutes once the sauce is applied.
Step 9 – Remove And Serve
Remove the ribs and hold up with some tongs to check their doneness.
When held up, the larger the crack that appears in the rack itself, the more done they will be.
Leave to cool for 10-15 minutes, and then serve these juicy ribs which can be easy to cook in this mostly hands-off method.
How To Tell If Ribs Are Cooked
Along with looking for the deep smoky brown color ribs are known for, another way to test how well cooked some ribs are is the classic toothpick test of inserting a toothpick into the meat on occasional intervals to check if it slides in easily with no resistance, if there is a to of tough resistance then it ends to be cooked a bit longer.
Another great way to check is by using a meat thermometer to check on the internal temperature of the ribs once they are finished.
If the temperature is from 190 to 200 degrees when fully cooked, then this indicates the meat is well done.
Can the Smoking Method for Pork Loin also be Applied for Ribs?
Yes, the smoking method for pork loin can also be applied for ribs. The slow smoking process of “smoking pork loin for pulled pork” can infuse the meat with a complex and flavorful taste that works just as well for ribs. It results in tender, juicy ribs with a delicious smoky flavor.
Extra Tips For Smoking Ribs
Smoking ribs can luckily be done easily and ready in just a few hours, however it can always be worth keeping in mind some extra hints and tips to make the cooking process as easy as possible and to produce the very best results.
One major tip is to not always rely on cooking times or your meat thermometer to gauge if the ribs are done.
While a heat thermometer is great for checking the final temperature and judging how well done the meat is, one of the best ways to tell if the ribs are tender but still well cooked is the “bend test” which involves using some tongs to lift the rack up once it’s cooked.
When holding up half of the ribs, if well done the rack should bend slightly and the meat should start to slightly split across the top.
If the ribs are overcooked and the meat has come out a little too soft, then the pieces will fall off almost immediately when holding them up with tongs, while if they are undercooked they won’t bend at all because of how tough they are.
Alongside testing the ribs, it is also very important to use the foil correctly when wrapping it around the ribs.
It’s important that the aluminum foil is wrapped as tight as possible to make sure they don’t steam and end up with a soggy exterior.
When you are wrapping the ribs, it can also be good to add some liquid in the form of water or apple cider to help impart the flavor and carry it through to the final product, this is especially important if using an electric smoker.
Other Methods Of Cooking Ribs
While smoking some ribs is the best way of tenderizing the meat at a high heat while retaining as much flavor as possible, there are a few other ways you can sizzle up a rack in a short amount of time.
For a traditional barbecue, cook the ribs long and slowly on the grill for a few hours with charcoal and wood chips being added every so often in order to keep the temperature steady.
Another method you can do this is roasting the ribs first on a low and slow heat until they’re tender.
Then, grill the softened up ribs over a blazing fire.
You don’t even need a grill itself to actually start cooking up some ribs and to get them to a nice and succulent texture.
In fact, you can simply roast them at a low temperature until they are nice and tender, this can usually only take around 5 hours overall.
You can even opt to use a broiler after the roasting process to add a thicker and crispier crust.
If you’re a big fan of chicken wings and the flavourful crunchy texture that makes them distinct, you can even apply this to ribs if you wanted to, simply braise them in a flavourful liquid and then deep fry the ribs to make them super tender with some added crisp.
Or if you wanted to just braise the ribs without any deep frying, then this can also be done for some absolutely delicious ribs that can be cooked up in one pot or a slow cooker.
Simply braise the ribs with some flavourful liquid until they are nice and tender, then add some sauce and serve after they are fully cooked.
If you find that you are very short on time and need the ribs prepared quickly for an upcoming barbecue, you can also use a pressure cooker in the same way.
Summary
When looking for ways to smoke ribs the 3-2-1 method will be the first option to pop up and while it’s quick and easy to pull off, it’s not always the most reliable method especially for different kinds of ribs, so it can be much more worthwhile finding alternative smoking methods such as these to guarantee some juicy and delicious ribs every time.